In this project, I was assigned to create simple Vagrantfile for serving simple webapp with bash automation (the one i created in previous project) with private IP 192.168.56.100.
Table of contents
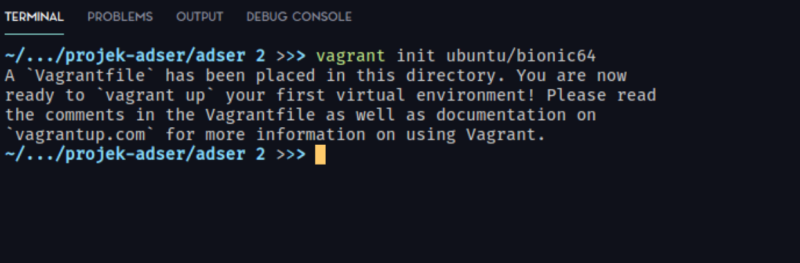
1. Initialize Vagrant
First, we can initialize vagrant directory by using vagrant init
vagrant init ubuntu/bionic64
2. Vagrantfile Configuration
After that, we can modify our Vagrantfile to match the project specification.
Modify IP
First, change the IP address to 192.168.56.100
config.vm.network "private_network", ip: "192.168.56.100"
Add Shell Script
Then, change the vm provisioning to shell and provide path to the previous script that we created.
config.vm.provision "shell", path:"script.sh"
The final Vagrantfile should look like this,
# -*- mode: ruby -*-
# vi: set ft=ruby :
##########
## By: mohzulfikar
##########
Vagrant.configure("2") do |config|
  config.vm.box = "ubuntu/bionic64"
  # Set the private IP
  config.vm.network "private_network", ip: "192.168.56.100"
  config.vm.provider "virtualbox" do |vb|
    # Customize the amount of memory on the VM:
    vb.memory = "1024"
  end

  # Specify bash script path
  config.vm.provision "shell", path:"script.sh"
end
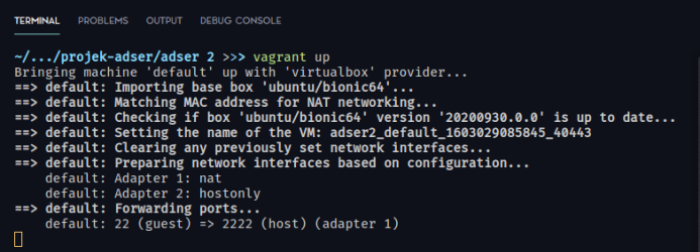
3. Provisioning the VM
The rest step is straight-forward run the following command,
vagrant up
And wait a few minutes.
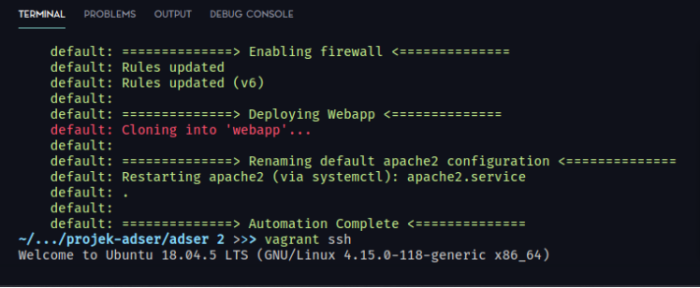
As you can see, we have the output “Automation Complete” from our script printed just like we run it before on EC2.
You can check the webserver status via ssh or just go to the IP to check if the webapp are successfully deployed.