Is it possible to sign commit (make our commit have green badge) locally? Yes it’s possible, in this post i’ll guide you on how to do that.
Table of Contents
Motivation
If you’re using github for a while and ever edit your file in the platfrom, you’ll notice that your commit have Verified status like this.
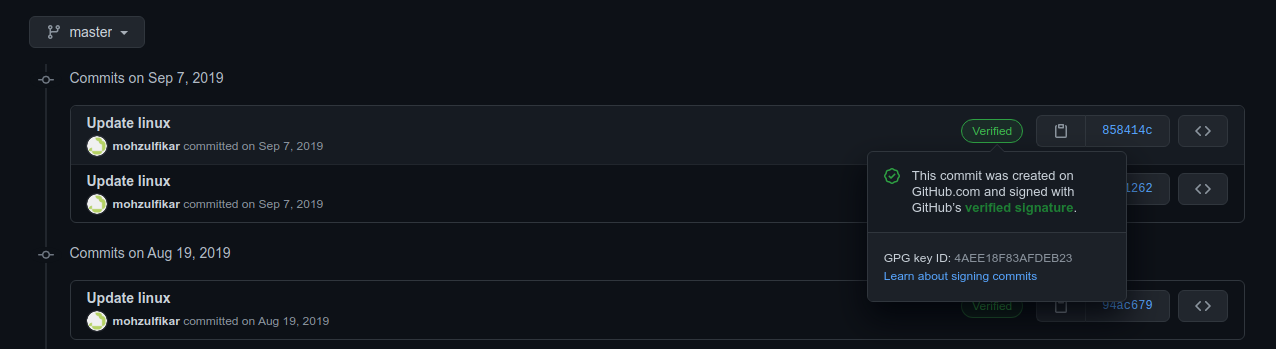
Then, if you edit your file in the local computer and push it to github the Verified status isn’t there.

So then, what are those status? How and why should we Verify our commit?
Well, if you know that recently there’s someone that want to inject backdoor on PHP git repository. This is a hot topic of conversation recently. Besides PHP there are many similar cases in other OSS project. Sometimes, the party who commit the malicious code “disguise” as someone that have well-known reputation in that community. This case can be avoided using GPG. In short, by using GPG we can add digital signature to ensure that our commit is from trusted party (e.g. ourself) and no one can disguise as ourself as long as they don’t have our key. Like SSH, GPG is implemented using asymmetric cryptography. Meaning that we share our public part to Github for enabling this feature.
So, before jump into the guide, how can someone “disguise” their commit? Well, it’s very simple actually. With git, we can configure our username and email in local machine using this command,
git config --global user.name "Your Name"
git config --global user.email "[email protected]"
You may figure it out now. Yes! We can change those configuration to another person. But, where can we get those information? Use git log and you can see the author name and email. Then, what will happen if i commit change as someone on some repositories? The commit author will chage to that person!
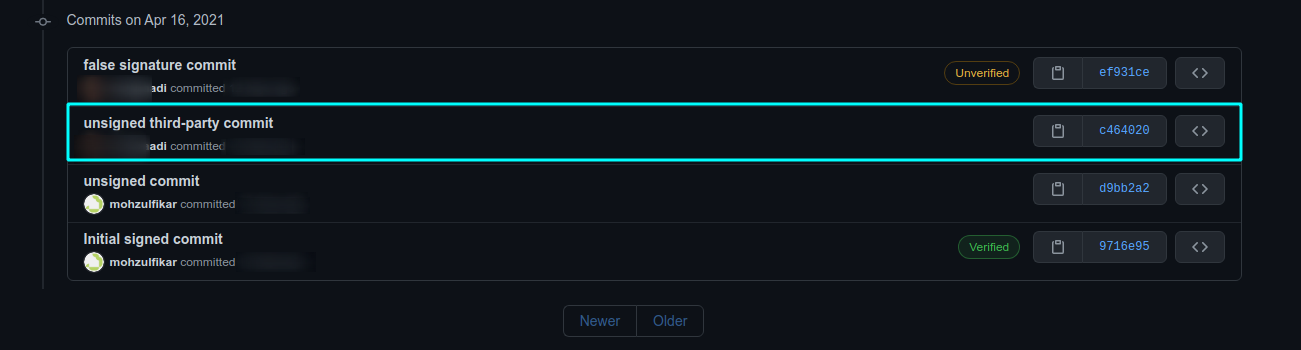
You may have a question now “is this a security hole?”. Well, this is neither a vulnerability nor security loophole in git. When there’s unsigned commit on pull request, we can’t guarantee that the one who commit those changes are the “real author”. This process of verifying the identity is what we called “Authentication”. That’s why digital signature comes in.
There’s additional resource if you want to see another blog post like this, visit this link.
So then, enough of the motivation and let’s get started.
1. Setup GPG
Before generate GPG keys, make sure that GPG is installed on your OS. You can see this page and select the installation binaries based on your OS (most linux distro already come up with GPG so you don’t need to install it). Also, make sure that you have GPG version 2.2 or later.
In this post, i’ll give an example on Linux so Windows or MacOS user (if you use gui tools) may have to adjust (or maybe i’ll create it later).
2. Generate New Key
Open Terminal and generate new key using gpg (or gpg2 in some other distro).
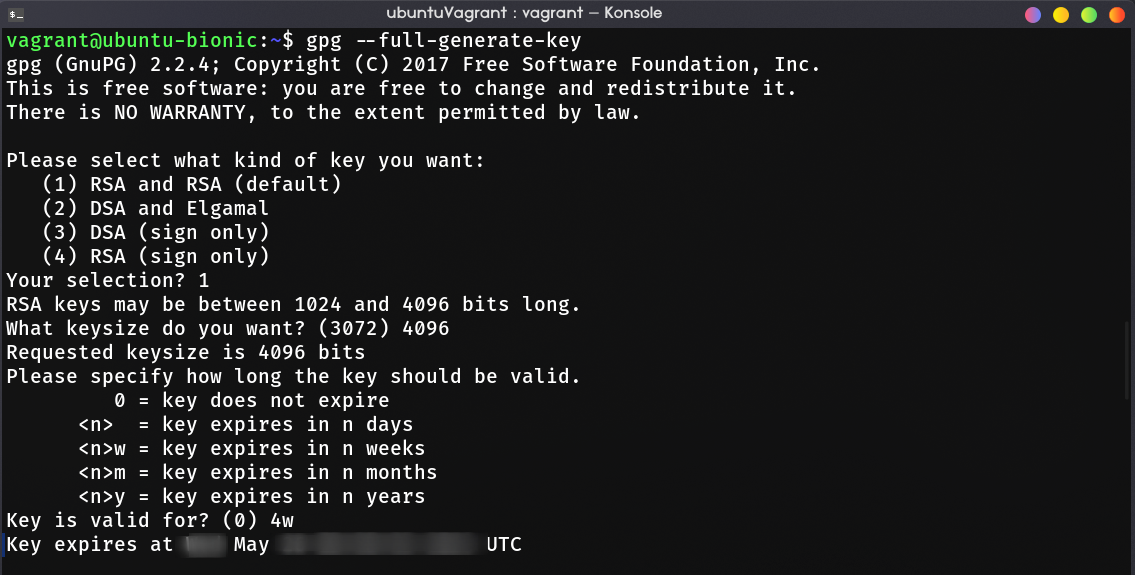
gpg --full-generate-key
# some distro use gpg2 for the name of gpg v2 binary
gpg2 --full-generate-key
If you asked to select the kind of key, select RSA and RSA (first choice). After that, enter 4096 for the keysize. For how long the key should be valid, choose the right time for you. Because we use RSA 4096, i recommend to set the expire date to 2-4 years (2y). In this example, i just make the key expired after 4 weeks.
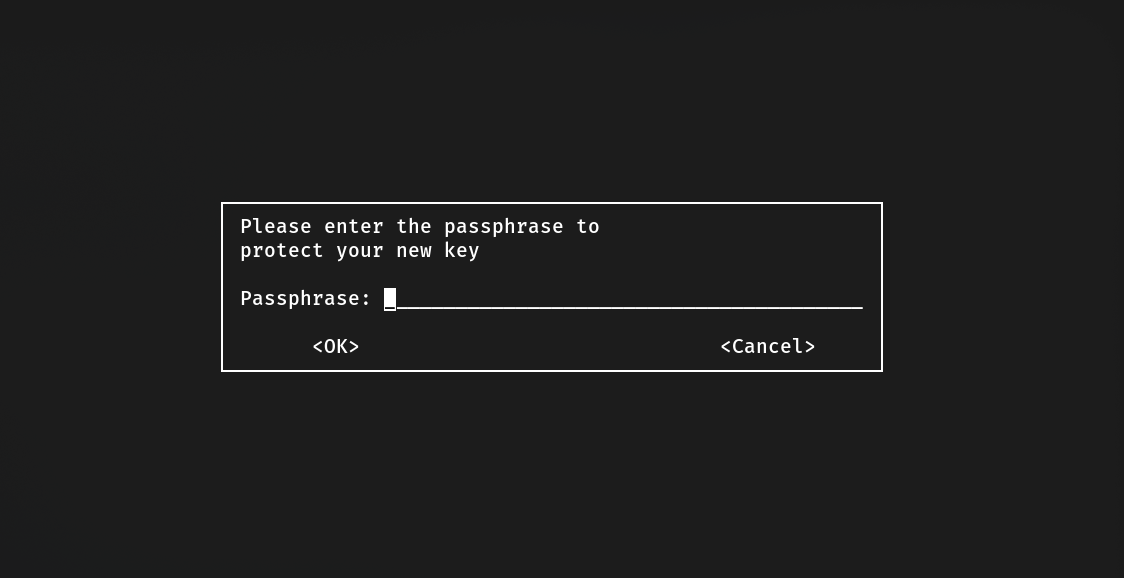
The last part is to enter your Github author information, enter your name and email address. Type O to verify the information you provided and you’ll be asked for passphrase. This passphrase will be used when you want to sign a commit. Choose the passphrase that you can remember easily (or just generate in this link)
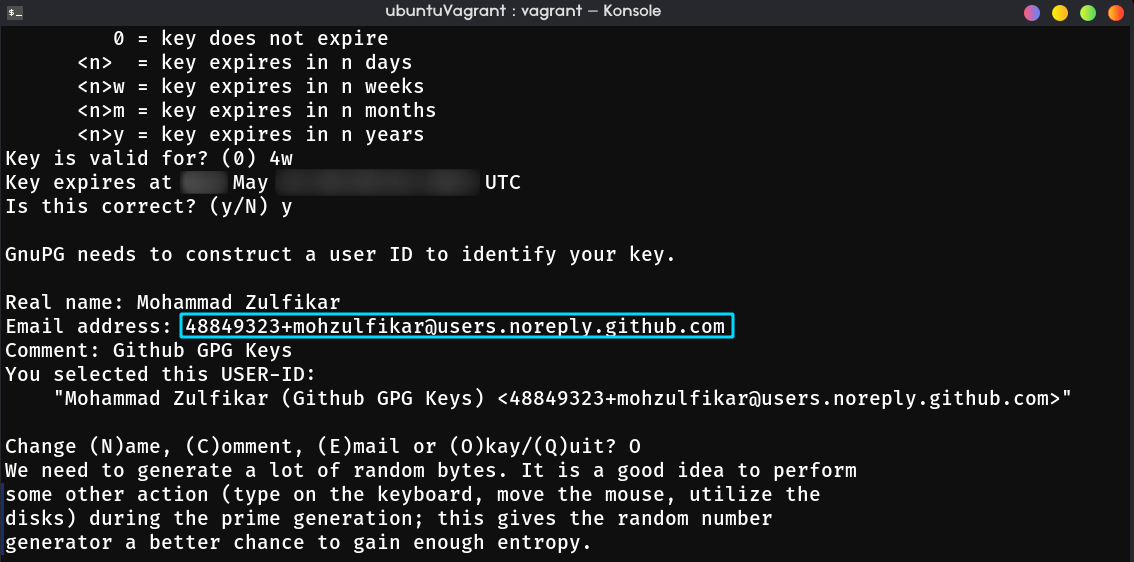
Take a note that if you enabling “Keep my email addresses private” in emails setting, you have to enter the generated email by github instead of your personal email (ends up with @users.noreply.github.com).
Finally, you’ll be asked to do another thing that triggers I/O, CPU, memory, or disks utilization to give GPG enough entropy for generating random number. Just browse something, download, or do anything. It usually takes up to 3 mins, after it gains enough entropy, the key should be generated.

3. Add Your Key to Github
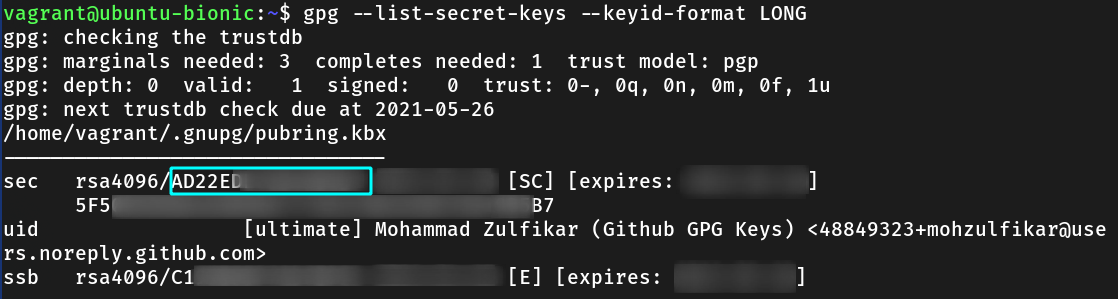
Now, we must add GPG key to Github. List your key and get the key ID. After that, output the public part of the key with --export option.
gpg --list-secret-keys --keyid-format LONG
gpg --armor --export A1B2C3D4E5F6 # replace with your key ID
Note the public part of your key, it SHOULD BEGIN WITH ---BEGIN PGP PUBLIC KEY BLOCK---.
Open github and go to the keys setting. Paste your key to the text area.


4. Configure Your Git
Now that we’ve successfully add the GPG key to GitHub. Next, we must tell Git that we want sign every commit from today. To do that, change global git property user.signingkey with the value of key ID and commit.gpgsign with the value true. This behaviour can also be override with local git config setting or --no-gpg-sign option when commiting to a git project.
git config --global user.signingkey A1B2C3D4E5F6 # replace with your key ID
git config --global commit.gpgsign true

## then start your first signed commit
git commit -m "your commit message"

## can be overriden by this command
git config --local commit.gpgsign false
git commit --no-gpg-sign -m "your commit message"
That’s it! Now, you can make “verified” commit even in your local machine! Just start with simple commit or make your own repo to test it.
A thing to remember, don’t forget the passphrase of your gpg keys (choose an easy to remember passphrase in the first place).