In this project, I was assigned to create DNS server with EC2 instance with group of 3 students.
This is basically a team project, i teamed up with Fikri and Rafi. Also, i actually have to redo the assignment because our submission is not actually what the project intended too (we don’t delegate zone, thus we basically just add A record on our DNS record). I also read this and this guide for this project. You should see their website too! :)
Table of contents
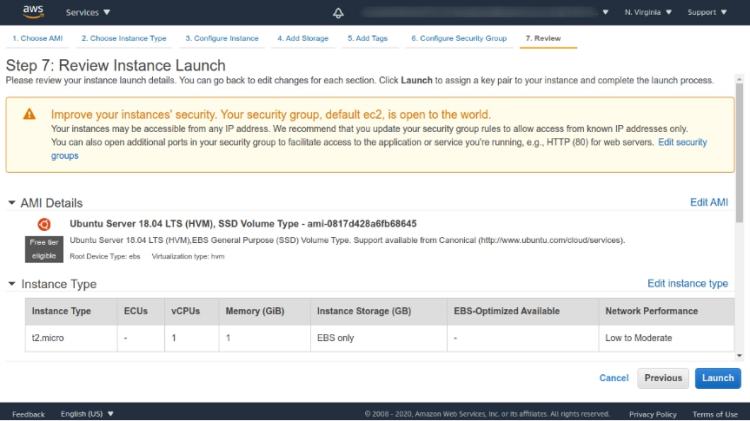
1. Setup EC2 with Elastic IP
Launch an EC2 instance and attach Elastic IP to it. Here’s step-by-step to attach Elastic IP to an instance if you want a refresher.
Launch an Instance
In this example, i use t2.micro which is available for free-tier usage. For the image, i use ubuntu 18.04.
A quick note here, make sure you have proper security group configuration (open ports for DNS, etc.)
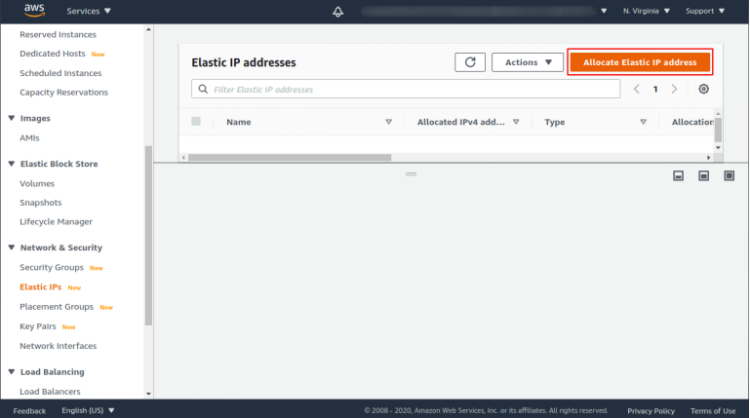
Allocate Elastic IP
There’s 2 step for attaching elastic IP to an instance, the first is to “allocate” or get an IP from amazon’s pool of IPv4 addresses and then we “associate” the IP to the instance. To allocate elastic IP, look at EC2 dashboard in the “Network & Security” category, select “Elastic IPs”.
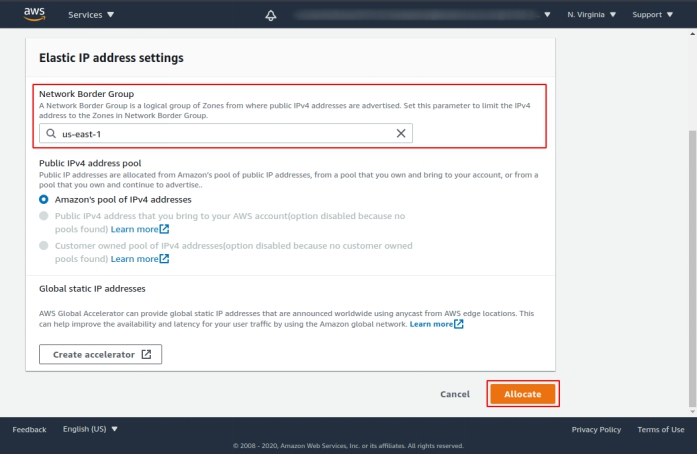
As you can see, we’re provided with many option here. For Network Border Group, choose one that are line-up with your instance location (in my case is us-east-1), then click “Allocate”.
Associate Elastic IP
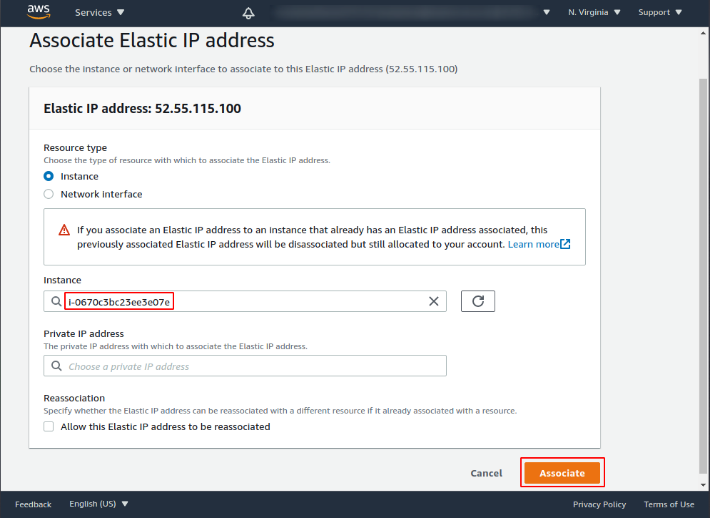
After we successfully allocate an IP, we can associate it. Click on the IP we allocated before, select “Actions” button on the top, select “Associate Elastic IP address”. Then, select the correct instance ID, click “Associate”.
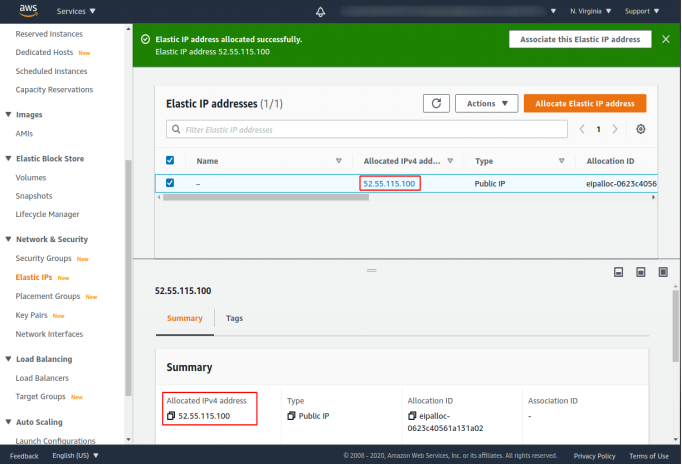

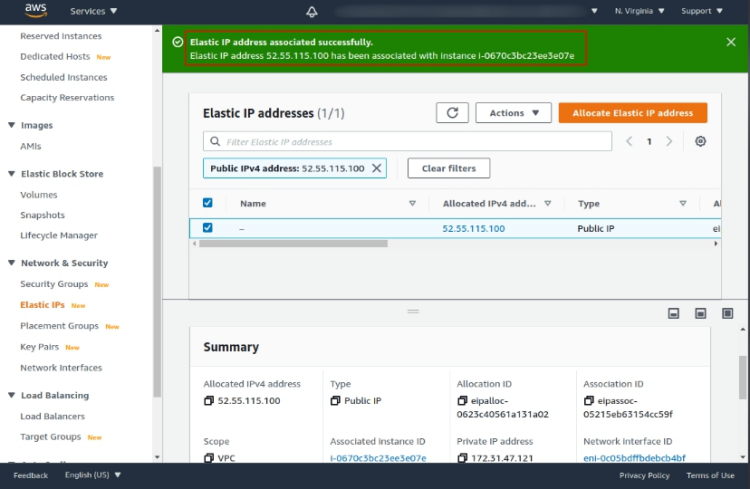
Elastic IP has been successfully associated. Note the IP because we use that later.
2. Setup Authoritative Name Server
Bind9 Installation
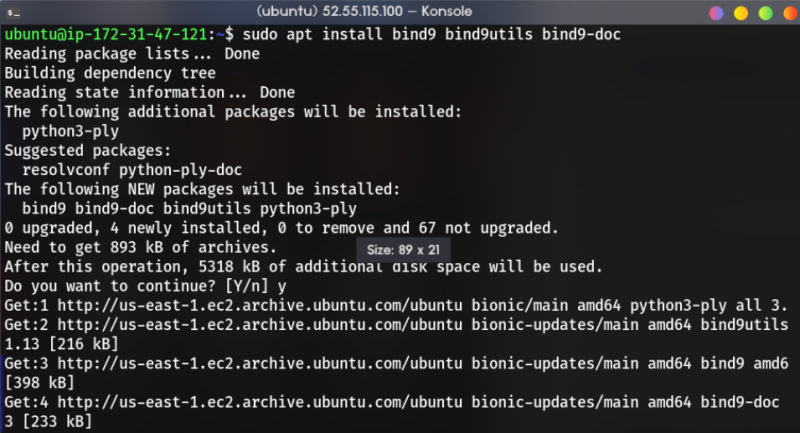
SSH to the instance we created and install bind9, bind9utils, and bind9-doc.
sudo apt install bind9 bind9utils bind9-doc -y
After that, check if bind9 service is running and then enable the service using systemctl.
sudo systemctl status bind9
sudo systemctl enable bind9

Configuration
There’s 3 file that we need to look at and configure, the first one is named.conf.option located at /etc/bind/. In this case, i don’t modify the file but if you want, you can add ACL block.
The second file is at /etc/bind/named.conf.local, create new zone block you want to delegate to this DNS Server. For example, in this case i create new zone called delegated.mohzulfikar.me. Something to take a note here, you can have custom name for zone, but it’s considered a best practice if you name it to match the subdomain. For the file location, it’s also a best practice to follow subdomain name with db prefix.
zone "delegated.mohzulfikar.me" {
        type master;
        file "/etc/bind/db.delegated.mohzulfikar.me";
};
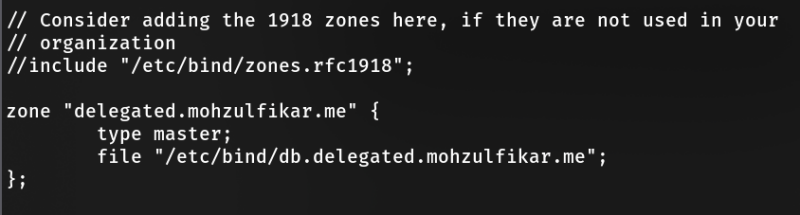
For the third file, you must create it first according to the database filename in previous file configuration. You can copy from the template provided from bind.
sudo cp /etc/bind/db.empty /etc/bind/db.delegated.mohzulfikar.me
3. Delegate New Zone
Setup Personal/Private DNS Server
Before continue to create zone, we must configure custom DNS for our domain first. Just go to your domain dashboard and create new personal dns server first and write the ELASTIC_IP that we associate before (for the nameserver, you can just use ns1 or ns2 or whatever available).
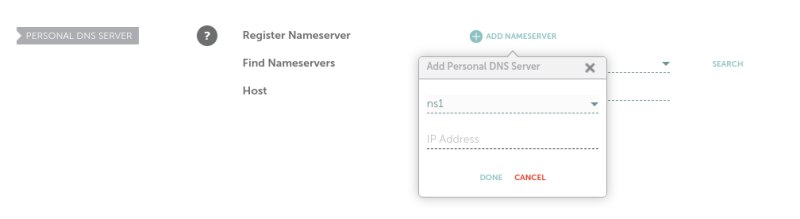
I use namecheap for managing my domain, there may be a little difference in the other provider.
Add NS Record
The next step is add new NS record. Why? Because i only delegate delegated.mohzulfikar.me to ns1 nameserver i created before, so i must tell my DNS management (mohzulfikar.me) to points the management of delegated.mohzulfikar.me subdomain to ns1 nameserver.
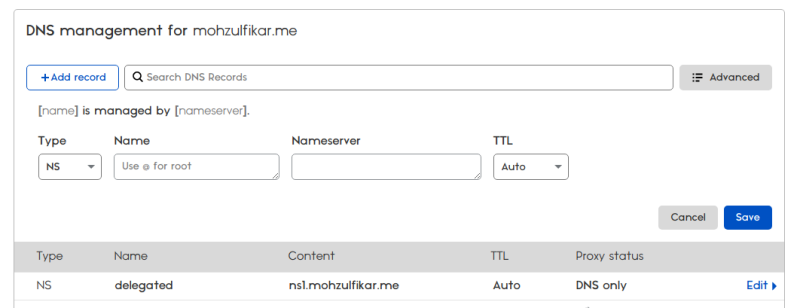
BTW, I use cloudflare for managing my DNS
Setup Database File
After that, we will change the database file. First, let’s have a look on the SOA part. You can change the serial, i changed it to 4.
Then, add NS and starter A records pointing at your desired host.
@       IN      SOA     ns1.mohzulfikar.me. admin.delegated.mohzulfikar.me. (
                              3         ; Serial
                         604800         ; Refresh
                          86400         ; Retry
                        2419200         ; Expire
                          86400 )       ; Negative Cache TTL
;
        IN      NS      ns1.mohzulfikar.me.

dev.delegated.mohzulfikar.me.   IN      A       54.OOO.OOO.OOO # replace with your host IP
test.delegated.mohzulfikar.me.  IN      A       54.OOO.OOO.OOO # replace with your host IP
Create Log File (Optional)
To help with troubleshoot, you can create, format, reformat the log file of bind9 with the following command. The following command is from this site, don’t forget to check their website too.
echo 'include "/etc/bind/named.conf.log";' >> /etc/bind/named.conf
Then, create named.conf.log with the following content,
logging {
 channel bind_log {
   file "/var/log/named/bind.log" versions 3 size 5m;
   severity info;
   print-category yes;
   print-severity yes;
   print-time yes;
 };
 category default { bind_log; };
 category update { bind_log; };
 category update-security { bind_log; };
 category security { bind_log; };
 category queries { bind_log; };
 category lame-servers { null; };
};
Then create directory for the log,
mkdir /var/log/named
chown bind:root /var/log/named
chmod 775 /var/log/named/
Finally, create logrotate for bind.log at /etc/logrotate.d/bind.
/var/log/named/bind.log
{
    rotate 90
    daily
    dateext
    dateformat _%Y-%m-%d
    missingok
    create 644 bind bind
    delaycompress
    compress
    notifempty
    postrotate
        /bin/systemctl reload bind9
    endscript
}
Finish Up the Setup
Check with named-checkzone command,
sudo named-checkzone delegated.mohzulfikar.me /etc/bind/db.delegated.mohzulfikar.me
It should output “OK”.
After that, restart bind9 service using systemctl. Also, don’t forget to check the status, it may have some error because typos or something.
sudo systemctl restart bind9
sudo systemctl status bind9 # make sure the status is
                            # "active (running)"
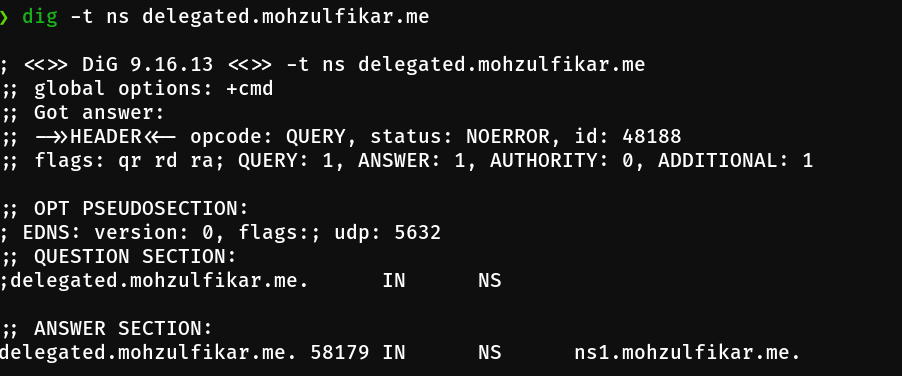
Done! You can wait the DNS propagation, it usually takes from 30 minutes up to 48 hours.

You can also check if the name server for delegated zone is changed (different with non-delegated zones) by using dig command,
dig -t ns delegated.mohzulfikar.me